MODFLOW 6 Example: Initial Set Up |
MODFLOW 6 Example: Initial Set Up |
In this step, we will start the model and define the layers used in the model.
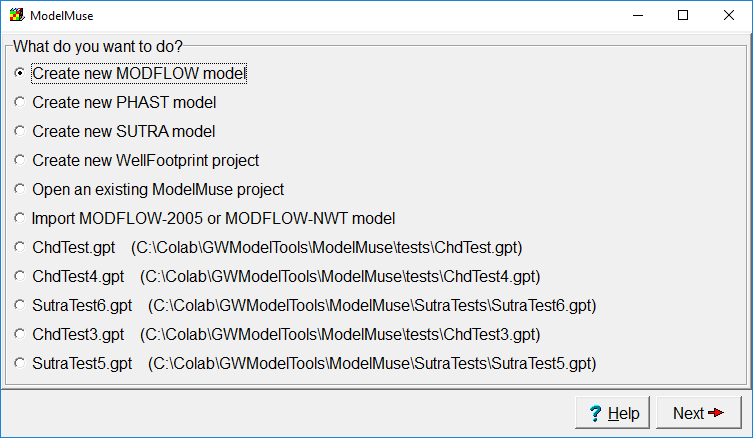
Start ModelMuse and select "Create new MODFLOW model." then click the "Next" button.

Select "Create new MODFLOW model."
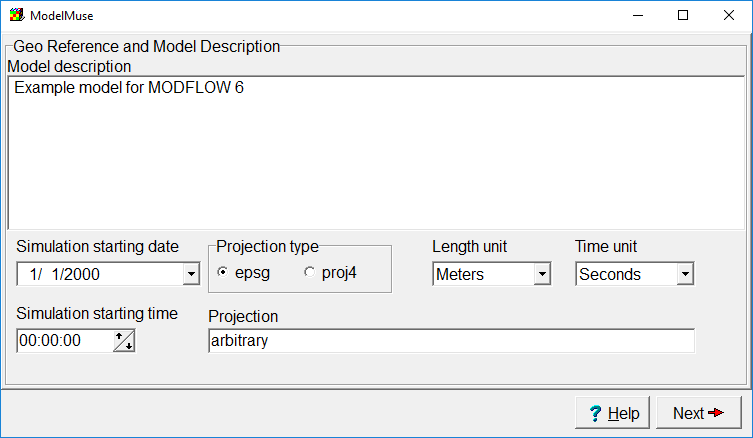
Enter a description for the model and specify the projection, simulation starting date time, and the length and time units. You can change these later in the Geo Reference dialog box, and in the Description and Options tabs of the MODFLOW Options dialog box. In this case, the model is entirely hypothetical so there is no real projection. For a real model you would want to specify the coordinate system to help document the model. If you don't know the coordinate system when you start the model, leave the projection edit box empty. When you go to run the model, ModelMuse will warn you that the projection has not been specified. The description of the model will be included as comments at the beginning of the MODFLOW Basic package input file. When you run the model, you can update the description in the Open File dialog box in which you specify the MODFLOW name file. click the Next button again.

Specify model description, projection, and model units
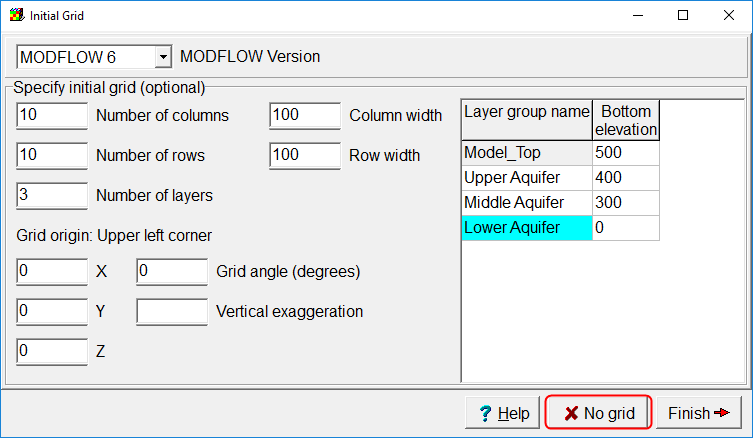
In the Initial Grid dialog box, you can specify which version of MODFLOW you want to use, the number of columns, rows, and layer and their sizes. (You can edit the layers later in the MODFLOW Layer Groups dialog box. For this example, specify the grid elevations (500, 400, 300, and 0) but leave everything the same. Then click the "No Grid" button.

Specify the layer elevations and clcik the "No grid" button.