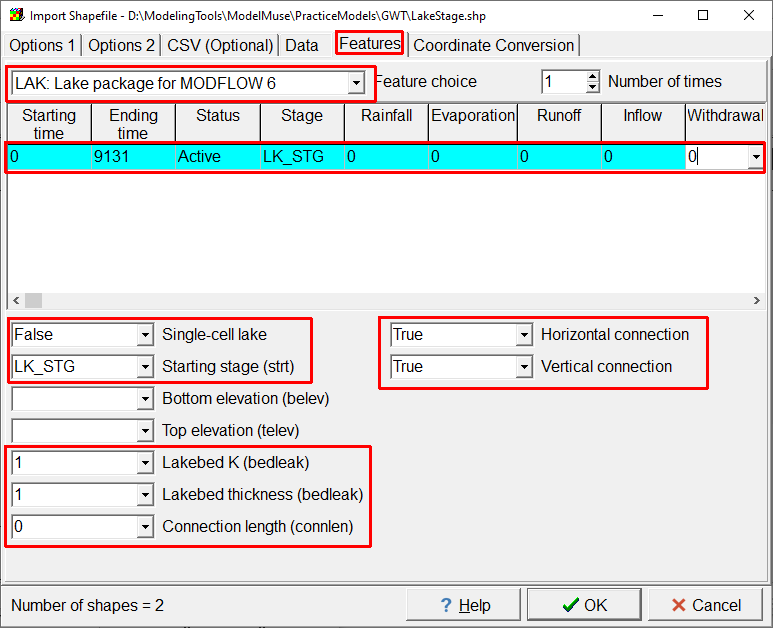
The lakes will be imported from LakeStage.shp. Some of their properties will be edited after the lakes are imported. All the lakes are on the top layer. You can use the OBJECTNAME attribute to assign the names of the imported objects. When importing the lakes, use the LK_STG attribute to assign both the Stage for the stress period and the initial stage. The lake should be active and the rainfall, evaporation, runoff, inflow, and withdrawal should all be zero. Single-cell lake should be set to False. Horizontal connection and Vertical connection should both be set to True. The lakebed K and lakebed thickness can both be set to 1. Connection length only applies to single-cell lakes so it can be set to zero. The bottom elevation, and top elevation of the lake will be set after the lakes are imported. The lakes are in the top layer.

Screen capture of the Import Shapefile dialog box showing the import of lakes.
After importing the lakes, edit both of them in the Object Properties dialog box. Set both of them so that ModelTop is the top elevation of the lakes and the bottom of layer 1 is the bottom elevation of the lakes.
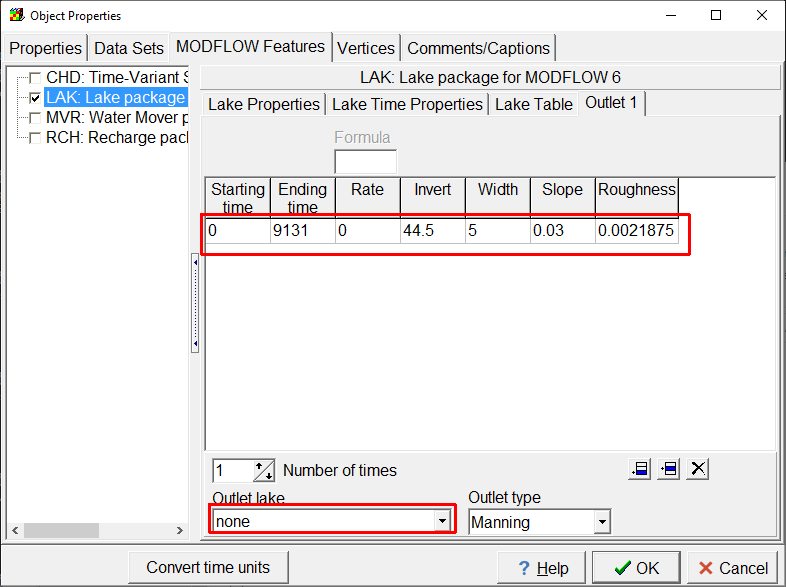
In Lake1, specify that there is 1 outlet. Set its rate to 0, Invert to 44.5, width to 5, slope to 0.03, and roughness to 0.0021875. The outlet lake can be left as "none." Later on, we'll use the Water Mover (MVR) package with this lake outlet. When you close the object properties dialog box, it will warn you that the flow from the outlet isn't directed elsewhere. You can click on the "No" button to close the warning and accept the changes make to the lake.

Screen capture of the Object Properties dialog box illustrationg the specification of a lake outlet.