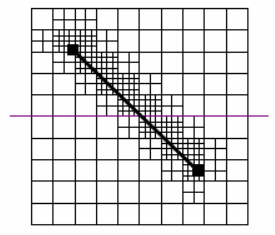
ModelMuse version 4 supports only one type of DISV (Discretization by Vertices) grid in MODFLOW 6 namely a quadtree refined grid. Unstructured grids and other types of DISV grids might or might not be supported in the future. A quadtree refined grid, starts with a structured grid and then subdivides cells into four equal parts. Those cells may be further subdivided (fig. 1).

Figure 1. DISV grid
.
Steps in specifing a quadtree refined grid.
1.If the model is not already a MODFLOW 6 model, switch to a MODFLOW 6 model (“Model|MODFLOW 6”).
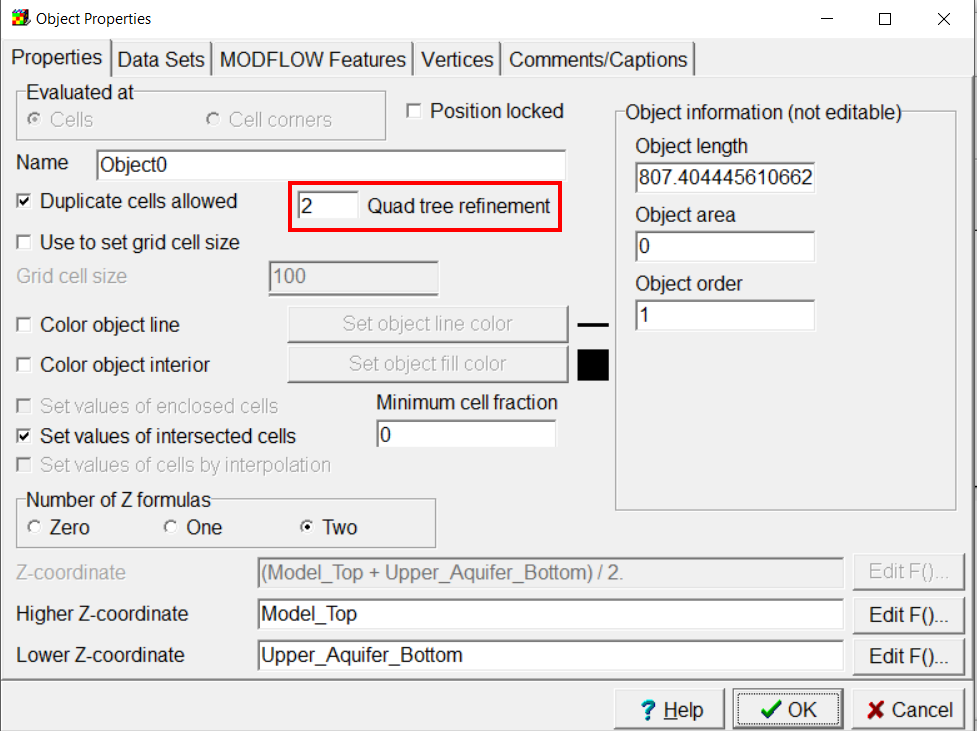
2.Create an object and specify the level of quadtree refinement (fig. 2). Cells enclosed or intersected by the object will have quadtree refinement applied. To apply quadtree refinement along the edge but not the interior of a polygon, it is necessary to set the number of Z formulas to zero. (With a 3D polygon, intersected means intersect not only the vertical edges but also the horizontal top and bottom surfaces.)
3.From the Grid menu, select "Switch to DISV." When the DISV grid is generated, the edge of each cell in the structured grid will be split into 2q cells where “q” is the quadtree refinement level. For example, if q = 0, the cell will not be split because 20 equals 1. If q equals 2, the edge of the cell will be split into 4 equal parts for a total of 16 cells.

Figure 2. Specify Quad tree refinement level
When switching to a DISV grid, the grid menu item and toolbar are replaced by a DISV menu item and toolbar (fig. 3). To specify additional areas of quadtree refinement, the user can add, remove or edit objects that specify the quadtree refinement level and then either select DISV|Refresh quadtree refinement or click the “Refresh DISV grid” button  on the DISV toolbar. It is possible to switch back to a structured grid by selecting “DISV|Switch to Structured Grid” to edit the structured grid.
The maximum allowed quadtree refinement level in ModelMuse is 6. Testing with higher levels of refinement indicated that higher levels slowed down the generation of the DISV grid too much.

Figure 3.Screenshot of DISV menu and toolbar
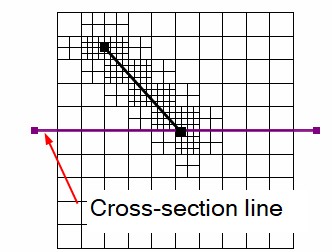
In addition to the grid cells in the DISV grid, the top view of the model has a purple line. This is the cross-section line (fig. 4). It works the same way as the cross-section line in SUTRA models as described in Winston (2014). The cells intersected by the cross section are displayed on the front and 3D views of the model.

Figure 4. Screenshot of cross-section line in DISV grid.
There are three additional buttons on the DISV tool bar.
The “Move cross section” button  allows the user to drag the cross section to a new position by clicking and dragging with the mouse. Each end of the cross section can be dragged separately or the whole cross section can be dragged by dragging the middle of the cross section. Another way to move the cross section is by clicking on the Model Cube on the front view of the model.
The “Rotate cross section” button  allows the user to rotate the cross section around the vertical axis by dragging with the mouse.
The “Generate grid” button  generates a new structured grid and converts it to a DISV grid.
The actions of these buttons can also be accessed through the DISV menu. The DISV menu also allows the user to set the cross section to a specific angle or position or to restore it to its default position.